9 Safety Steps to Prepare a Vegetable Tree House
The morning soil crumbles between your fingers with the texture of dark chocolate, releasing a scent both mineral and sweet. Learning how to prepare a garden for a vegetable tree house begins with understanding that this structure merges vertical architecture with edible production, demanding foundation stability equivalent to orchard planting combined with the precise drainage of raised-bed systems. The concept transforms traditional arboreal platforms into productive ecosystems where pole beans climb support posts, tomatoes cascade from elevated planters, and root crops anchor the base perimeter.
Materials
Soil amendments must target a pH range of 6.2 to 6.8 for broad vegetable compatibility. Incorporate 2 cubic yards of composted pine bark per 100 square feet to improve cation exchange capacity in clay soils. Apply alfalfa meal at 4-4-4 NPK ratio, broadcasting 5 pounds per 100 square feet three weeks before planting. Kelp meal delivers trace minerals and cytokinins at 1-0.5-2 ratio; use 2 pounds per 100 square feet.
Structural elements require rot-resistant lumber: black locust or cedar posts, 6×6 inches, sunk 36 inches below grade. Galvanized joist hangers rated for 400 pounds per connection prevent platform failure under saturated planter loads. Hardware cloth with 1/4-inch mesh excludes voles while permitting mycorrhizal fungi colonization from native soil horizons.
Planter construction demands untreated wood or food-grade HDPE liners. Each elevated bed requires 18 inches of depth minimum for determinate tomato root systems. Line planter bottoms with 3 inches of expanded shale for drainage, then fill with a blend of 40% compost, 30% peat moss, 20% vermiculite, and 10% worm castings. This mixture provides adequate porosity while maintaining moisture through afternoon heat loads.
Timing
Hardiness Zones dictate foundation work windows. In Zones 5 through 7, excavate post holes in early March when frost heaves cease but before spring rains waterlog subsoil. Complete structural assembly by April 15 to allow wood settling before planting pressure begins. Southern gardeners in Zones 8 to 10 can prepare from January through February, targeting transplant dates when soil temperatures stabilize above 55°F at 6-inch depth.
Last frost dates govern seeding schedules. Count backward 8 weeks from this date for starting tomatoes indoors, 6 weeks for peppers, 4 weeks for cucurbits. Direct-sow pole beans when soil reaches 60°F; cold germination below this threshold invites Pythium root rot. Install climbing infrastructure two weeks before transplanting to prevent root disturbance from post-installation trenching.
Phases

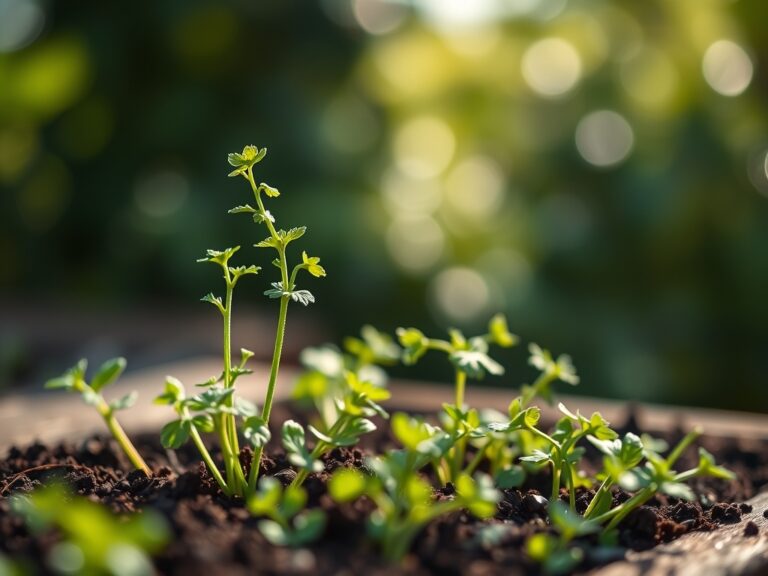
Sowing Phase
Seed germination in controlled environments produces vigorous transplants. Use sterile seed-starting mix, never garden soil, to prevent damping-off pathogens. Maintain temperatures at 75°F for solanaceous crops, 70°F for cucurbits. Provide 14 hours of light at 6 inches from seedling crowns using T5 fluorescent fixtures. Water from below using capillary matting to strengthen stem caliper.
Pro-Tip: Inoculate transplant root balls with Rhizophagus irregularis spores at 10 grams per gallon of water. This arbuscular mycorrhizal species extends phosphorus uptake radius by 400% in elevated planters isolated from native fungal networks.
Transplanting Phase
Harden seedlings over 10 days by reducing water frequency to twice weekly and exposing plants to outdoor conditions in graduated intervals. Transplant during overcast afternoons to minimize transpiration stress. Dig planting holes 1.5 times root ball diameter. Position tomato seedlings so first true leaves sit at soil line, encouraging adventitious root formation along buried stems.
Apply starter fertilizer at 1-2-1 ratio, diluted to half strength, immediately after transplanting. Create 3-inch soil rings around plant bases to direct water toward root zones rather than planter edges.
Pro-Tip: Angle tomato cages at 15 degrees toward structure's center. This inclination improves auxin distribution in main stems, promoting thicker trusses and reducing fruit drop during wind events common in elevated positions.
Establishing Phase
Root systems colonize planter volume over 21 to 28 days. Monitor soil moisture with a tensiometer; maintain readings between 10 and 30 centibars. Mulch with 2 inches of straw to moderate temperature fluctuations that stress transplants in exposed locations.
Train climbing beans using jute twine rather than wire; rough fiber provides better tendril grip. Pinch cucumber lateral shoots to two nodes, concentrating energy into vertical main stems suitable for tree house architecture.
Pro-Tip: Foliar-feed with fish emulsion at 5-1-1 ratio weekly during establishment. Spray undersides of leaves at dawn to maximize stomatal absorption before temperatures exceed 80°F.
Troubleshooting
Symptom: Interveinal chlorosis in upper leaves
Solution: Indicates iron deficiency from alkaline pH. Drench soil with chelated iron (Fe-EDDHA) at 1 ounce per gallon. Reduce water pH to 6.0 using citric acid if source water exceeds 7.5.
Symptom: Blossom-end rot on tomato fruit
Solution: Calcium translocation failure, often from inconsistent moisture. Install drip irrigation on timers delivering 0.5 inches every other day. Foliar-spray calcium chloride at 2 tablespoons per gallon weekly.
Symptom: Powdery white coating on squash leaves
Solution: Powdery mildew thrives in high-humidity microclimates under platforms. Space plants 24 inches apart. Apply sulfur dust at 3 pounds per 100 square feet every 10 days. Prune lower leaves to increase air circulation.
Symptom: Holes in leaves with metallic green beetles present
Solution: Japanese beetles. Handpick adults into soapy water at dawn when cold temperatures slow reflexes. Apply Bacillus thuringiensis galleriae (Btg) to soil to target grubs in August.
Symptom: Wilting despite moist soil
Solution: Verticillium wilt in solanaceous crops. Remove affected plants immediately. Solarize planters with clear plastic for 6 weeks at 140°F soil temperature. Rotate to resistant varieties like 'Iron Lady' tomatoes.
Maintenance
Water elevated planters to 1 inch per week, increased to 1.5 inches during fruiting. Confirm depth with rain gauge rather than visual assessment. Fertilize every 14 days with 5-10-10 formulation once fruit set begins, applying 1 tablespoon per plant dissolved in 1 gallon of water.
Inspect structural connections monthly. Tighten bolts to 45 foot-pounds torque. Check planter drainage holes for root blockages; ream with wire if water pools on surface. Prune determinate tomatoes to 4 main stems, indeterminate varieties to 2 stems. Remove suckers when 2 inches long by pinching, not cutting, to prevent viral transmission.
Scout for pests twice weekly. Threshold for action: 2 aphids per leaf, 1 hornworm per plant, or any stink bug presence. Apply neem oil at 2 tablespoons per gallon as broad-spectrum organic control, spraying to runoff on leaf undersides.
FAQ
What load capacity does a vegetable tree house platform require?
Calculate 150 pounds per square foot for saturated planters. A 4×8-foot platform needs joist capacity of 4,800 pounds, requiring doubled 2×10 joists at 12-inch spacing.
Can root vegetables grow in elevated planters?
Carrots and beets perform well in 18-inch-deep containers. Choose short varieties like 'Paris Market' carrots (3 inches) or 'Detroit Dark Red' beets. Avoid parsnips and salsify requiring 24-inch depth.
How does elevation affect pollination?
Wind speeds increase 20% per 10 feet of height. Hand-pollinate squash using cotton swabs transferring pollen from male to female flowers between 8 and 10 a.m.
What prevents planter soil from compacting over seasons?
Incorporate 2 inches of compost each spring. The organic matter maintains aggregate stability and prevents bulk density from exceeding 1.2 grams per cubic centimeter.
Do mycorrhizal inoculants survive in containers?
Yes, if organic matter exceeds 5% by volume and synthetic fertilizers remain below half-strength. Re-inoculate annually at 5 grams per planter in early spring.